Zentyal Installation
On this page, we will explain how to install Zentyal 7.0 on an Ubuntu Server 20.04 on an EC2 instance from AWS cloud provider. The objective is simply to install Zentyal 7.0 with only the essential modules and confirm that there are no network incidents after a reboot.
For the installation, we will use this script available from Zentyal. It is worth mentioning that we will install Zentyal without a graphical environment, as we want to reduce the resource usage needed by the server.
The environment data for the project will be:
- Server Name: arthas
- Domain: icecrown.es
- IP: 10.0.1.200/24
- Network Type: Internal
- Name of an additional administrative user: djoven
Requirements
- The operating system must be
Ubuntu 20.04 LTS. - The server must have a minimum of 4GB of RAM.
- An administrator user (group
sudo) is required.
Considerations
- The steps described below are identical in both cloud and on-premise environments.
- In case of not having robust knowledge about Linux, it is recommended to use the commercial version, as support access can be contracted, which can be very useful in case of incidents or version updates.
- If the server is installed in a cloud provider or a location without physical access to the server, the stability of the network module will be critical. Below are some recommendations regarding this:
- Define the configuration that will be set in advance.
- Assign a specific IP to the instance's network interface (in case a cloud provider is used).
- Set the instance IP as static in Zentyal.
- It is recommended to configure the network card in Zentyal as internal, thus avoiding self-blocking during the initial configuration.
Previous configuration
Before proceeding to install Zentyal, we will perform the following actions:
-
We connect to the instance through SSH using the private key that we downloaded when creating the Key pair:
-
We set a password for the users;
rootandubuntu: -
We update the server packages:
-
We create an additional administrative user, which we will use to manage Zentyal from the administration interface:
Warning
It's important that the user belongs to the
sudogroup, otherwise we won't be able to use it to access the administration interface. -
We log in with the newly created user:
-
We create the necessary directory and file to host our public key to be able to connect via SSH:
-
Finally, we add the contents of our public key to the newly created file
.ssh/authorized_keys.
Instalation
From now on, the server will be ready to install Zentyal 7.0. Here are the steps to follow for its installation:
-
Create a directory where we will store the Zentyal installation script:
-
Download the script and give it the appropriate permissions:
-
Install Zentyal through the script:
Note
We will answer
nto the question: 'Do you want to install the Zentyal Graphical environment?', since we don't want to install the graphical environment.The Zentyal packages that the script will install for us are:
- zentyal (meta-package)
- zentyal-core
- zentyal-software
Warning
At this point, we cannot restart the server until we have installed and configured the network module, otherwise the server will start without an IP address and we will lose access through SSH.
-
Once the script has finished, we log in to the Zentyal administration panel: https://arthas.icecrown.es:8443
Info
If we haven't created the
Arecord in the DNS, we will use the public IP address of the instance. -
We log in with the administrator user that we previously created, in my case it's djoven.
-
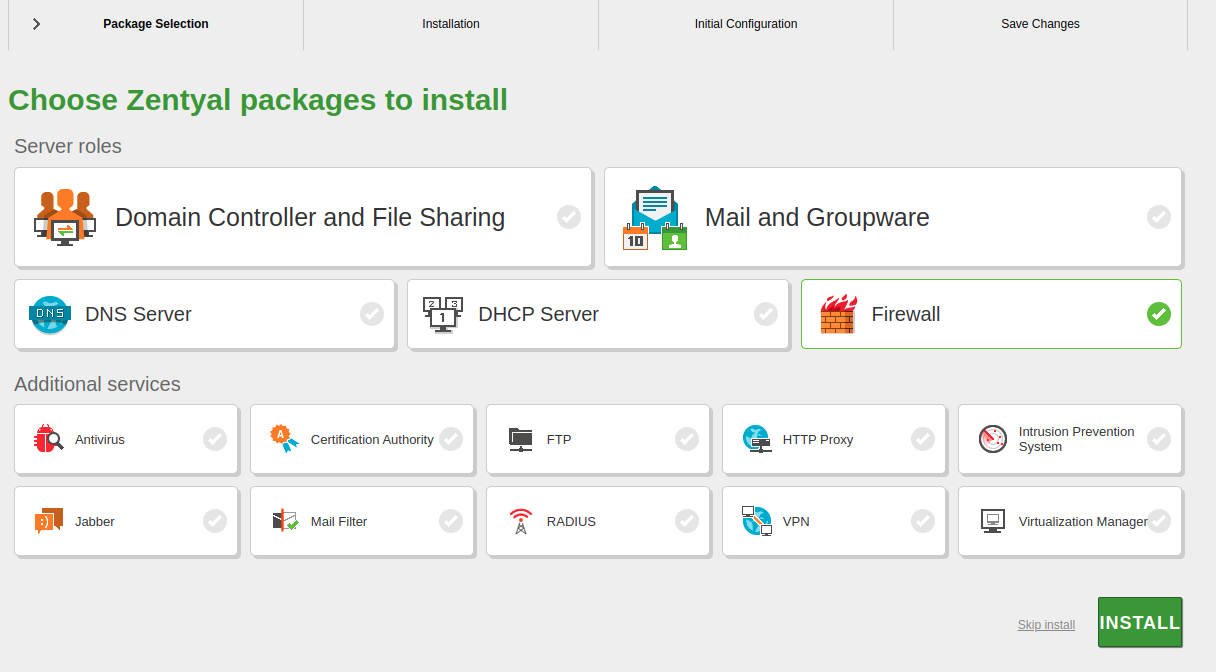
In the initial configuration wizard, we only install the firewall module, this way the network module will be installed as a dependency.
-
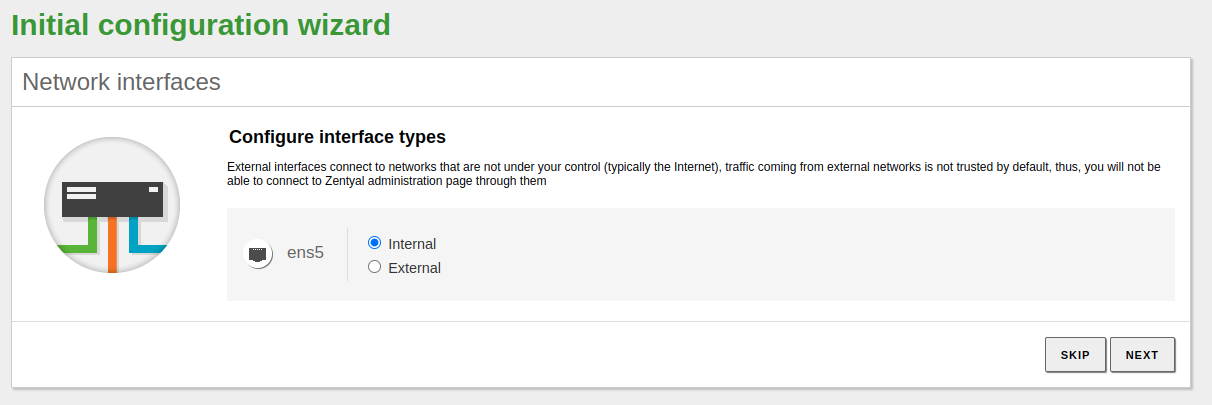
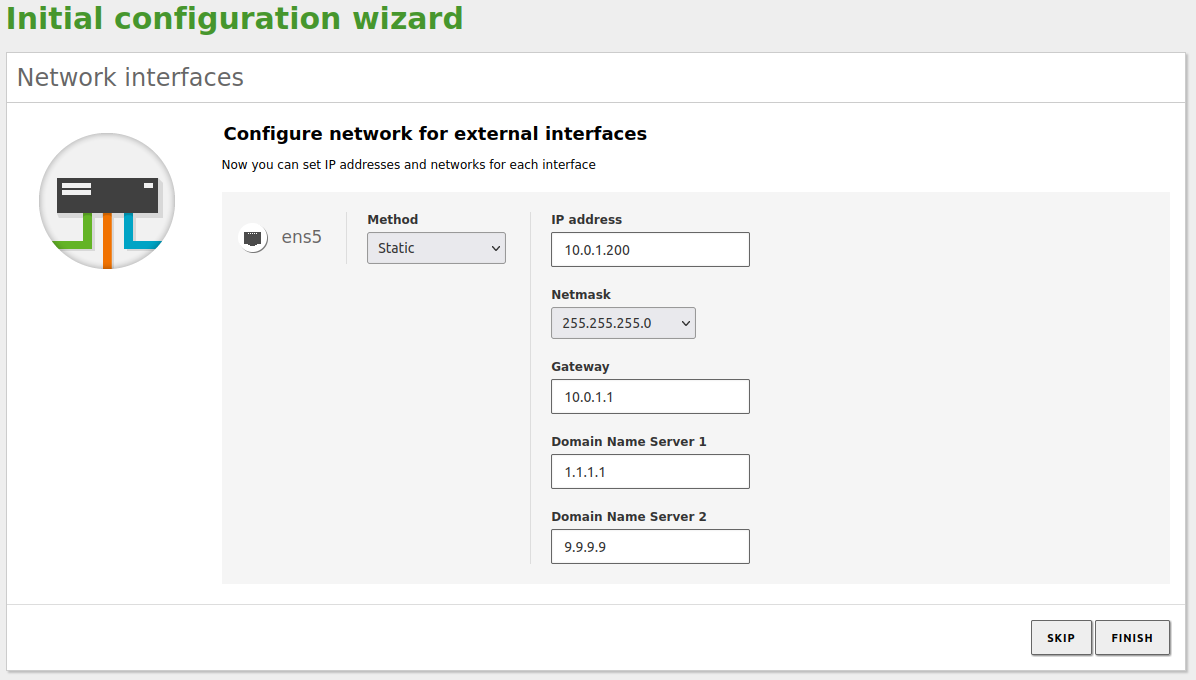
We configure the network card as internal and static:
Warning
It's possible that when the network is finished configuring, the reported bug here will occur. If this is the case, follow the steps described on the Bug fixing page (see top navigation menu) or simply modify the URL to: https://arthas.icecrown.es:8443
-
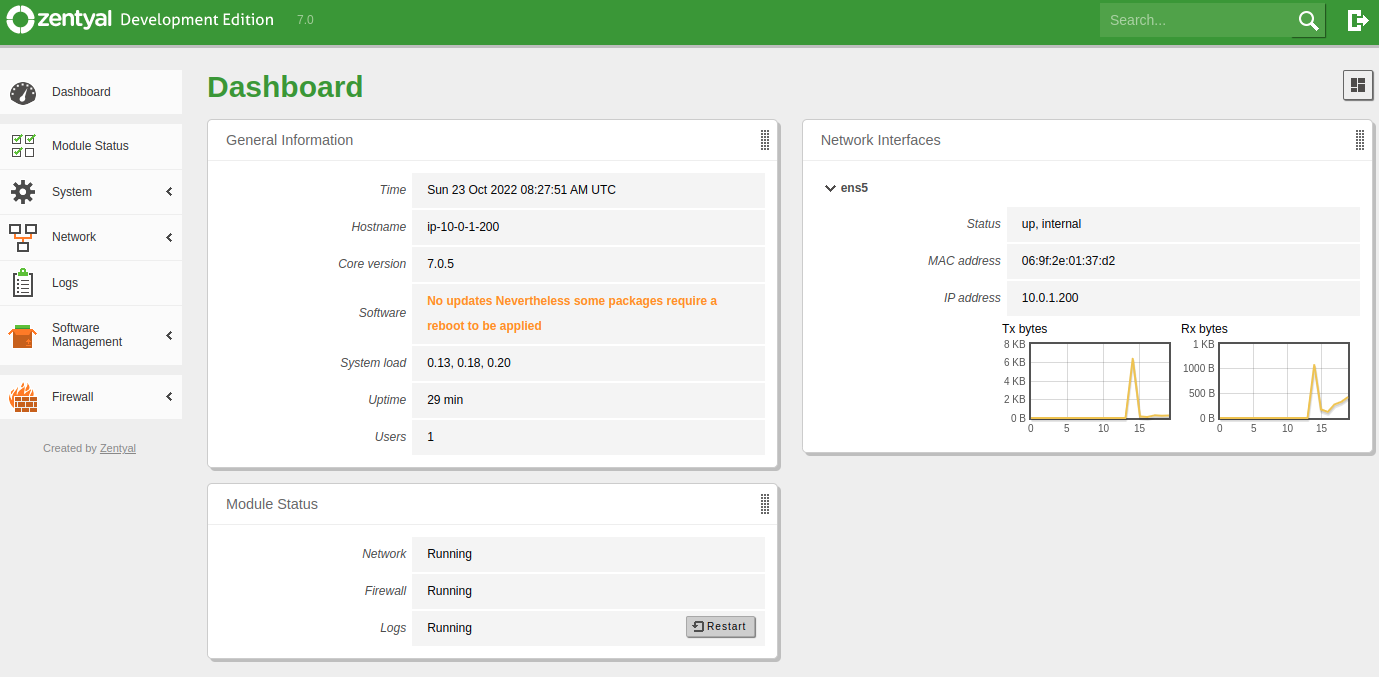
Once changes have been saved, we can start managing Zentyal through the dashboard.
-
Finally, before proceeding to configure the server, we will perform the following checks to confirm the stability of the server:
- We ensure that all modules are enabled (Modules Status).
-
The machine has access to the Internet:
-
There have been no errors in the log
/var/log/zentyal/zentyal.log. Here is an example of the logs without any errors: -
We restart the server to ensure that it is able to start without any network problems.
-
We verify that we can connect through SSH and to the Zentyal administration interface.
Created: April 12, 2023


